
Appearance
Managing Users
- Open the Flow Designer
- Navigate to
Global Setup > Users - Click
Cancelto close the window without changes, or clickSaveto close the window and save any changes you have made
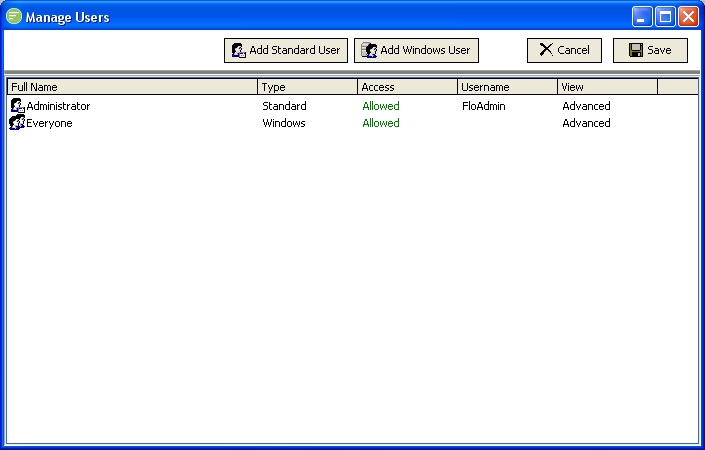
The Manage Users window displays the list of users that are currently allowed to access Flow. It displays both Standard and Windows users. From this window you can specify whether the user is allowed access to Flow or not, and whether they are using the Simple or Advanced view. Once a user has been added to Flow you can assign permissions to the user through the Manage Security window.
Adding a new Windows User
A Windows user is one that is linked from your Microsoft Windows network. This can be either a local user or domain user account. You manage the details of the Windows user account through the Microsoft Windows User Account Management screens. From within Flow you can control only whether that user has access or not.
TIP
Windows users can be either specific user accounts or account groups. By selecting an account group any windows user that is part of that group will have access.
Click the
Add Windows Userbutton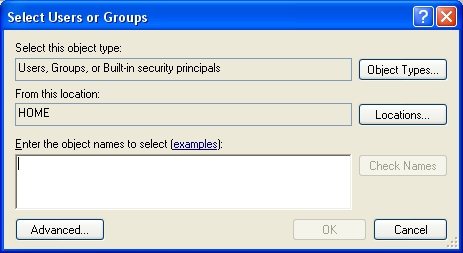
This displays a standard Windows dialog for selecting user accounts. Click the
Locationsbutton to select the location that you want to search for the user account - this defaults to your current computer (local user), change this to your domain controller to select a domain user.Type a name into the list box, or click the
Advancedbutton to search the list of users on the selected Location.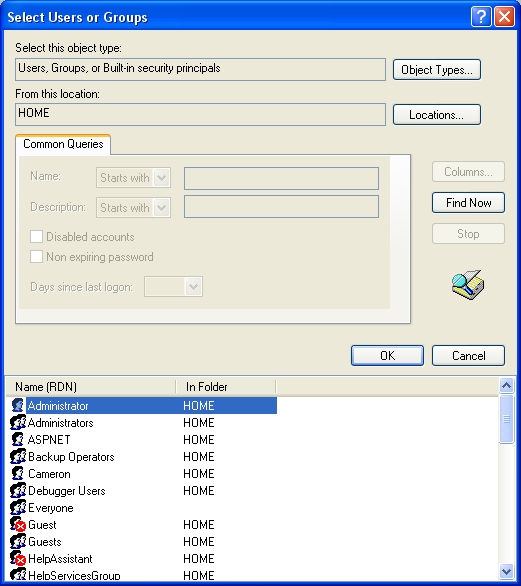
In the Advanced dialog click the
Find Nowbutton to display the list of users then select the desired user account and clickOK. The user account will now display in the list box.Click
OKto accept the selected user accounts.The user details are now displayed in the
Manage Userswindows. Select whether the user is allowed access or not, and whether they are using the Simple or Advanced view.
Adding a new Standard User
Standard users are not recommended anymore and are superceded by Windows Users. A Standard User is one that is created and managed within Flow. You must enter the username and provide a password.
Click the
Add Standard Userbutton to create a new user. The user details box will appear at the bottom of theManage Userswindow.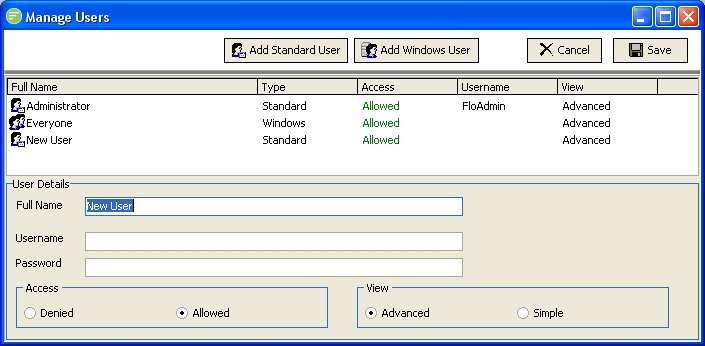
Replace the highlighted text with the desired
Full Name(or friendly name) of the new user account.Enter the
Usernamefor the new user account. This is the name that is entered on the login screen to log in with this user account.Enter the
Passwordfor the new user account.Select whether the user is allowed access or not, and whether they are using the Simple or Advanced View.
Editing an existing user
- Single click the desired user account in the displayed list within the
Manage Userswindow - The user details are now displayed. Edit the details as appropriate.
WARNING
Do not double click the user account as this will remove it. If you make a mistake simply cancel the Manage Users window and the changes will not be saved.
Removing an existing user
- Double click the user that you wish to remove. The user account will disappear from the list.
- If you make a mistake simply cancel the
Manage Userswindow and the changes will not be saved.